
Pan Dulce (Concha)
When I began to think about what baked product I would try for National Hispanic Heritage Month I thought of those colorful breads known as pan dulce- sweet bread. I always wanted to try to make my own brightly colored rolls that I saw at special booths at bakery shows—probably at a Bake Mark exhibit because the company manufactures commercial mixes for them. Research, research, research led me to my experiments with internet versions and one that I found in a textbook, On Cooking, by Labensky.
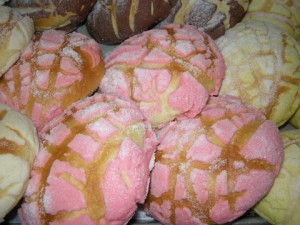
Bought some store made which were light, light, light and airy and asked my students to taste my version and compare to the store bought, and-wow-mine won the taste and moisture tests, though I was not satisfied. More testing led me to the current version which is explained in detail below.
Some of the modifications to the recipe include type of bread flour used, type of yeast used, using Mexican vanilla in the dough, and adding color and flavoring to the pastas. I also enlarged each of the rolls to 3 ounces the more commercial size of unbaked rolls.
Formula for Pan Dulce – (Conchas)
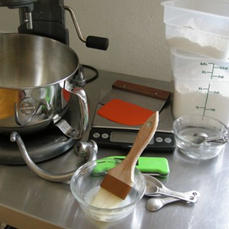
Mise en Place: Scale, pastry brush, plastic dough container(optional), sheet pans, parchment paper, bench scraper, bowl scraper, 6 quart mixer, dough hook, lame or single edges razor blade, standard measuring spoons, dough thermometer, custard cup for melted shortening, gloves, rubber scraper, spray bottle filled with water, microwave.
Dough:
Active Dry Yeast: 2 ounces
Water: 110 degrees F: 9 ounces
Unbleached Bread Four: 2 pounds plus 8 ounces
Eggs (cold): one pound
Granulated Sugar: 9. 75 ounces
Unsalted butter (room temperature): 6.5 ounces
Mexican Vanilla Extract: 2 tsp.
Salt (table): ¾ tsp.
Mise en Place: 5 quart mixer, paddle, tortilla press, parchment strips, cornstarch duster, rubber scraper.
PASTA TOPPING:
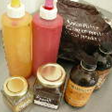
Unbleached Bread Flour: 8 ounces
Powdered Sugar: 10 ounces
Crisco Shortening: 10 ounces
Water: 3 ounces
Cocoa as needed for chocolate pasta (see directions),
Raspberry, Orange, Banana, Chocolate Extracts
Food Coloring: Pink, Yellow
Procedure:
Note: The method used for the dough is called straight dough method because you add all of the ingredients to mixer bowl directly after softening the yeast in the mixer bowl.
Part I: Dough
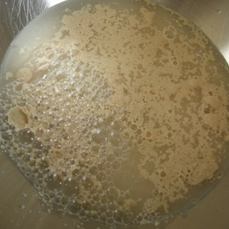
 (1) Yeast has softened and is ready to be added to the mixing bowl with all of the other ingredients
 (2)
(2)  (4)
(4)
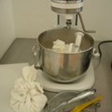
- Place yeast in 6 quart mixer bowl. Add 110 degree F water. Let yeast soften. To test, stir with your fingers and you will not feel any granules and the yeast are dispersed in the water. Take about 5-7 minutes.
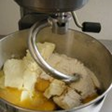
- Add all other ingredients for the dough: bread flour, cold eggs, granulated sugar, unsalted room temperature butter, Mexican vanilla extract, and table salt, to the yeast and water mixture. Mix three minutes on low speed. Scrape dough down into the bowl and off hook.
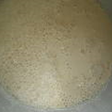
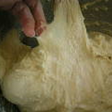
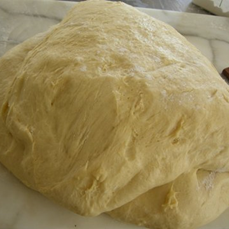
- Again, set mixer, this time at medium speed and knead dough with hook attachment until soft and smooth, about 7-8 minutes.
- Test for window pane and when a bit of dough stretches between fingers without breaking, scrape onto your bench(marble, sheet pan, stainless counter, wooden cutting board).Dough should have an internal temperature between 82-84 degrees as measured with a dough thermometer. Sprinkle lightly with flour and cover with a plastic bag.
- Deflate and fold dough over itself every 30 minutes for 2.5-3 hours. (I did three hours).
- While the dough ferments, make the pasta dough topping.
Part II: Pasta Topping
 (4)
(4)  (4)
(4)
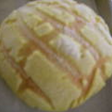
- For the pasta topping I want several flavors and colors: yellow, chocolate brown, raspberry red, and plain (banana).
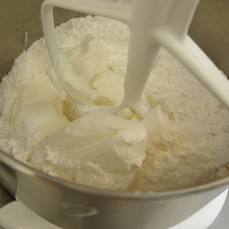
- Combine flour, powdered sugar, shortening, water in a 5 quart mixer bowl using paddle attachment.
- Divide mixed dough evenly using a scale: approximately 9 ounces for each color.
- Beginning with the lightest color desired I put the portioned dough back into the mixer bowl(if scraped clean of dough no need to wash each time you add the dough for a different color) and use the following formulas for each color and flavor of pasta toppings:
a.) Banana: 1 teaspoon banana extract, no added color
b.) Chocolate: 1 teaspoon chocolate extract and one-half ounce cocoa
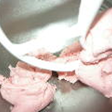
c.) Raspberry: one teaspoon raspberry extract and a drop of neon pink food color.
d.) Yellow: two teaspoons orange extract and a drop of yellow food color.
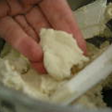
5. Each paste is mixed separately by putting the scaled 9 ounce portion back into the mixer bowl with paddle adding extracts and or color if needed. I started with plain, then yellow, then raspberry, then chocolate—no need to wash bowl each time if you scrape the bowl clean each time as the pasta should not be sticky.
Part III: Making the Pasta Rounds
 (2)
(2)  (2)
(2)  (3)
(3)
 (3)
(3)  (3)
(3)
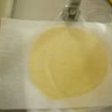
- Cut strips of parchment paper the width of tortilla press and the shorter width of the paper.
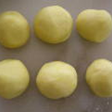
- Scale out pasta dough 7/8ths ounce each. I scaled 6 at a time to prevent drying of the dough, though more rounds could be kept under plastic so more could be done at a time.
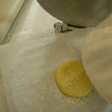
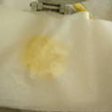
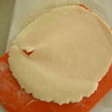
- Put one end of parchment paper onto opened tortilla press. Sprinkle with cornstarch puff place 7/8th ounce ball of pasta onto Parchment paper and press down lightly with hand. Fold parchment paper over this dough to cover and place a second portion of dough on top and flatten slightly with hand sprinkling with cornstarch puff lightly and cover this with the parchment paper. Press tortilla press over both dough portions firmly. You will have two flat rounds of dough that you will put as is in freezer to chill until you are finished with this procedure and ready to put on top of dough rounds.
Part IV: Scaling and Panning:
 (1)
(1)  (2)
(2)  (2)
(2)
 (3)
(3)  (5)
(5)  (5)
(5)
 (6)
(6)  (8)
(8) 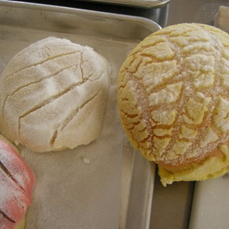 (8) comparison
 (9)
(9)  (10)
(10)
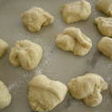
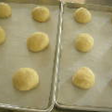
- After fermenting dough for 2.5-3 hours, Punch dough down gently to expel carbon dioxide and scale dough into 3 ounce portions. (I do this 12 at a time so that baking can be controlled. If I did all at one time I would need an extra oven. Though if things get out of control you can put dough into refrigerator to “retard” the fermentation.
- Round dough portions and place onto papered ½ sheet pan spaced three evenly along each side away from pan edges.
- Flatten each dough round not as a tortilla but about a scant one-fourth inch thick…
- Brush each piece with melted shortening to the edges of dough. (I use a heat safe custard cup and warm in the microwave.)
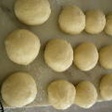
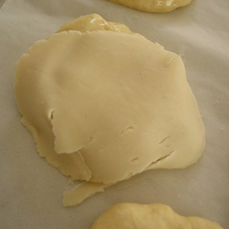
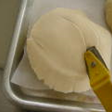
- Remove 12 flattened pasta round from freezer (can do this when you begin step 4) and place them onto the shortening covered flattened dough. (I use a bowl scraper to remove the pasta from the parchment paper. If some break—just piece together and press lightly.)
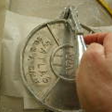
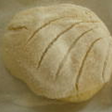
- Score top in a curved design with a lame, paring knife(pointed) or single edged razor to resemble a shell design)
- Liberally sprinkle granulated sugar over the scored colored pasta.
- Proof at room temperature (75-82 degrees F) until rolls are more than double in size—did take around an hour.
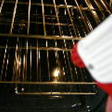
- Open preheated 375 degree oven and quickly spray around oven cavity avoiding any lights with water—15 seconds or less and put one tray of rolls into upper bottom oven rack position. Spray oven door and sides for quick second avoiding rolls and close the oven door.
- Bake at 375 degrees (check your oven temperature before with an oven thermometer) for 8 minutes and turn pan around to allow for even baking. You will bake approximately 6 minutes more. You can only bake one pan at a time in a conventional oven. If you have a convection oven you will have to adjust oven temperatures.
- When light brown, remove from oven and cool on pan approximately 10 minutes and remove from pan onto a cooling rack.
- Shelf life of cooled and covered rolls is three days.
- Sooo Goood! Enjoy! Chef Susan
